Saturday, February 27, 2016

Raccoon Problems


This post has information about how to trap and dispatch predators on your homestead. If you think all creatures can live in harmony, you should probably skip this one.

Everything is not perfect on any homestead. I found that out the hard way one night when a family of raccoon's decided they liked the taste of duck. I set out a trap and got one the first night. While they are cute, they are not to be taken lightly when you have poultry on your homestead. After I dispatched the first one, I had no other attacks for months. I got complacent and stopped locking the chicken coop door at night. Bad idea. I lost three chickens in one night. 

After that we started locking the door and letting them out in the morning. We forgot to lock the coop up one night and lost four more chickens for a total of seven dead. I constantly have the trap out and baited but these raccoon's are smart, I think they have been trapped before and let go. Please never do this. Once a raccoon learns what a trap is they will avoid them in the future.


It is illegal to trap and relocate raccoon's in the state of Ohio and many other states. If you want to keep poultry and you don't want to kill raccoon's and other threats to your flock, you have a problem. If you call animal control, they will come out and take them away to kill. And guess what, you get the bill. I know the price of .22 LR has gone up, but one round is much cheaper than a bill from animal control.
 
If you find yourself in a situation where the racoon you are trying to trap is avoiding your trap, try to camouflage your trap with just the front open. I am assuming you are using a Havahart trap or something similar. You can cover the trap with a cardboard box and cover that with leaves leaving only the entrance open. Use marshmallows as bait. This will stop you from catching cats with other baits like tuna or meat.

When you are faced with dispatching the animal you trap, you can read about many methods on the best way to do it. I researched them and came back to my initial thought, a single round of .22 LR. The animal is caged and it is easy to get a clean kill with one shot. Other methods are much worse. Some people throw the cage in water and drown the animal, I find this horribly cruel. Some people use car exhaust, basically suffocating the animal. This is unnecessarily cruel. One bullet is the fastest and most effective method in my opinion.

While we are on the topic of dispatching unwanted pests. Some people put out anti-freeze for cats and other unwanted animals to drink. Anti-freeze is sweet and animals will drink it thinking it is food. The main ingredient is ethylene glycol which is naturally sweet. The death these animals face is unbelievably horrible. The people who do this are some of the worse people. Please never do this.You can avoid accidental exposure by making sure the anti-freeze you buy has been treated with denatonium benzoate, a bittering agent added to make it unpalatable. Not all states require it to be added and most repair shops use professional grade coolant which is exempt. Please ask the question when buying anti-freeze or having your car serviced.


Friday, February 12, 2016

And We Are Back


Okay I know, it's been a year. I fell off of the blogging wagon. To be honest, I fell asleep at the reins, fell off and was run over but, I am back and ready to talk homesteading. This will be a quick catch up from our last adventures back in February. A lot has happened and changed in that time.


We were getting over a dozen eggs a day starting in the spring. We had so many we could not hope to eat them all so Dara started selling them at work. This was offsetting the feed cost for the most part, when Dara wasn't spending the egg money on snacks and coffee at work.


One of our chickens developed a limp and the other chickens started picking on her to the point that we had to separate her from the rest. Chickens can be real cloaca-holes. She was put up in her very own condo with her own food and water for about a week and half. She started walking fine again and was reintroduced to the flock with no further problems.


In other news, we have a duck that thinks she is a chicken and took over a nesting box in the chicken coop. Muscovy's are great mothers and when they go broody there is almost no stopping them from sitting eggs. The chickens didn't seem to mind and this was a good spot to get fresh duck eggs until I let her raise up some ducklings.


Here is the proud mama with her newly hatched ducklings. All total our two mature females raised up 18 ducks this year. They would have hatched more if I let them.We are down to 5 ducks now and a full freezer. More on that in the future.


Muscovy's love to play around in the water. When you have 20 + ducks on your property, you have to change this water everyday. The hardest part is making sure our border collie is no where around when I turn the hose on. He loves water in any form.


I put in a couple duck ponds around the yard. The only problem with a set up like this is changing the water every other day. If you have some elevated land and plumb the bottom of the pond with a drain hose, this would work very nice. I don't have any where to do that so I only dumped and filled this pond for a couple months. The baby ducks loved it.


I Know

I Am

Forgetting

Something...

So Many

Things Have

Happened

In The Last

12 Months...


Oh yeah, we got married in the Red River Gorge in Kentucky. We needed witnesses so we each invited our only siblings to bear witness. It was a great day and beautiful scenery. We both love the gorge, so it was an easy decision to get married in the wilderness. We are standing next to a 100 ft cliff, you know, just in case she got cold feet. 


We got another puppy. His name is Darwin and we thought we were getting a catahoula cattle dog crossed with a shepherd. At least that's what the pound said he was. Turns out he is a great dane mix and is over 100 lbs at 13 months now. He is a gentle giant and we love him.


Higgs caught the bouquet and promptly ate part of it. I want to thank Aaron, Dara's brother and Sharon, my sister for being our witnesses and dog handlers. 

Something

Else

Happened

Recently...

Let's see

Ducks

Puppy

Marriage

What am I missing?...


Oh yeah, so we had a baby. His name is Oliver and he was born in September. I was lucky enough to deliver him, cut the cord and gave him his first bath. In fact, he never left our sight the whole time. We were not paranoid about something happening to him, well maybe a little, but it just felt like the right thing to do was to always be there for him. "They" say children change you and you can't know how much until you have one, "they" are right.


This is Oliver's second trip to the gorge, his first post uterus. The Ergobaby carrier is awesome. We are on top of natural bridge. Oliver did just fine being hiked all over the place.


We are looking forward to being the best parents we can be. Ours lives are changing more than just adding a baby. I am leaving my cubicle jungle to stay home and take care of Oliver. The thought of strangers raising our baby at a daycare didn't sit well with us. It will be hard with the drop in income, but I know we will pull through. He is totally worth it. 


More regular posts to come soon...


Saturday, February 28, 2015

Barley Fodder System


Who doesn't like to see some greenery in the middle of winter? I know I do and so do my chickens. I started a very simple barley fodder system in our spare bathroom. All you need is some small art bins from your local big box store, water and barley seed.


Barley (Hordeum vulgare L.is the hardest thing to find, but if you go to any feed store you will be able to pick up a 50 pound bag pretty cheap. Do not go to your local home-brew store and pick up roasted barley. Roasted barley has already been sprouted and will not work for a fodder system. If you have already made this mistake, make beer with it.


The bin on the left has about a cup and a half of barley seed and a couple inches of water. That is day one. All of the other bins should have holes, smaller than a barley seed, drilled in the bottom. After the first 24 hours, you do not want the barley to be sitting in water. Just make sure you have enough holes drilled to drain the bin. Mine take about a minute to drain.


After 24 hours of soaking your seed, you will want to transfer them to one of the bins with holes in the bottom. Once you do this, put new seed in the soak bin. This is day three. You can see tiny sprouts coming out of the barley seeds. 


You repeat this process everyday. I like to do it in the morning, which is the same time I harvest the end product for the chickens. I have a 9 day system going. The first day is the soak, then each successive day the sprouts get larger until they are big enough to harvest.


These are day 6 and 7. You have to soak every bin twice a day. Since I am doing this in my spare bathtub, sometimes I just plug the drain and fill the tub up a couple inches and let them soak for 5 minutes. Or you can just pour water in each bin. It is very important to do this twice a day, once in the morning and once at night.


Here is day 8 an 9. Once you get to this point, you can feed this to your chickens. If you want it to get a little bigger you can pull out the whole sprout mat and just lay it across your bins. You can water it when you soak the bins and it will continue to grow for days if you want.


Once you take it out of the bin, it holds together on its own. You can see how easy it would be to continue letting this grow outside of the bin. I will mention that I am growing this system in our spare bathroom that stays very warm with the door closed. It is about 70 degrees in this room during the winter with the door closed. Having temps above 70 degrees will help with germination and growing. You do not need light though. This bathroom gets almost no sunlight. Most seeds have enough reserves to grow for awhile without sunlight. Barley will do just find growing with no light for two weeks.


Our chickens love the barley grass. The ducks are not so impressed, but they will peck at it. If you are growing this for Muscovy ducks, be warned, they may not touch it. Chickens on the other hand will fight over this green treat in the middle of a gray winter.


Wednesday, December 31, 2014

Duck Duck Peahen


When I have a crazy idea, Dara either tolerates it, or rolls her eyes and accepts it. I am lucky that she is pretty tolerant of my propensity to add more projects to the homestead. Recently she came home and said, "we are getting ducks". I think I am rubbing off on her. I wanted ducks as well, but I don't think she was asking.


I told her the ducks were her project. So who do you think feeds, waters and changes the bedding? Hint, their name consists of more than four letters. Here she is designing the duck house. I told her the dimensions of the left over wood I had laying around. I love it when we can build something out of scrap wood laying around.


Here it is. I have made some improvements to it since. I will do a winter duck post talking about how I insulated it later. Ducks don't really need much. If they have a roof over their heads, food and a water supply, they are pretty happy. My nephews kiddy pool turned into the puppy pool and has now turned into the duck pond.


The type of duck you get depends on what you want out of them. We chose Muscovy (Cairina moschata) ducks for multiple reasons. They are very quiet. If fact, they barely make a noise over a hiss. They require very little water and do not need a large pond to thrive. I do have plans to put in a sizable pond in the future. I am sure they will love it, but if you don't have a pond, a small kiddy pool or stock tank will work just fine. They are great foragers and will eat many pests on your property. They will pick mosquitoes out of the air and will happily devour garden slugs. They are cold hardy, great mothers, good egg layers in season, they will stand up to predators and the meat is great!


The large one in the middle is our breeding drake Half and Half. He came from our friend Mike's homestead. The female behind him is Mimi. She and the three young ones came from our friends over at Shady Coop Farm. Muscovy ducks are very interesting. They are native to South and Central America. They had been domesticated by many native peoples way before the "discovery" of the new world. All domestic ducks you have ever seen are all descended from the Mallard (Anas platyrhynchos) except the Muscovy, which has its own evolutionary path, sharing an ancestor with Mallard ducks.


Muscovy ducks are good flyers. Here is Half and Half on top of the garage with our peahen Fergie. At first they didn't care for each other. Now they seem to be good friends. We eventually caught the ducks and clipped their wings so they would not leave the yard. We were debating on whether or not to clip them. The decision was made when I found one of the young ducks in the road after work one night. That was our first livestock loss on the homestead. Clipping their wings does not hurt them and I recommend it if you plan on keeping ducks. 


Sunday, November 30, 2014

Perennial Harvest


We have had a lot of recent posts about chickens. This post only has pictures of them for scale. =)


Any idea what this is? A dirt golem? Maybe a Illithid? I planted this three years ago and decided it was time to harvest it. I noticed it was sending out runners and it was very close to one of our leach lines. It took the good part of an hour to get the whole thing out of the ground. I have a feeling I will be fighting this plant for years to come where I dug it up. It propagates rather easily from root cuttings.


Give up? It is a three year old horseradish plant (Armoracia rusticana). Horseradish is in the brassica family along with cabbage, broccoli and kohlrabi. This plant has been used by humans since records have been kept and most likely way before that. It has been used as a medicine since the middle ages. Most people know it for its edible qualities, notably that stuff you put in cocktail sauce. That pungent smell you associate with it is actually a chemical reaction that takes place when you break the cell walls. The grating process creates a compound called allyl isothiocyanate or mustard oil. Here is a pretty picture for my nerdy readers.


Do you like sushi? Do you like wasabi with your sushi? Most commercial wasabi is made from the horseradish plant, not the wasabi plant, which is hard to cultivate and expensive. Horseradish is used in the biochemical world quite a lot. An enzyme found in its roots; horseradish peroxidase , is used as a signal amplifier to help increase detectability of specific molecules.


Here it is all cleaned up. This is well over 10 pounds of horseradish. I gave a bunch away, stored a bunch in peat moss in the garage and plan to use all the runners and crowns in the spring to propagate it to sell. I killed two birds with one stone when I dug it up. I want to put in a bunch of small preformed ponds in my garden. The hole this left is the perfect place for one. 


Tuesday, October 28, 2014

Chicken Tractor's Final Move


As I alluded to in a previous post, the chicken tractor I built became a burden to move. I decided to park it and let it become a stationary chicken coop. I have three main reasons for this decision. The first being its weight and how hard it is to move. The second reason is shade. When I moved the coop in tractor mode, it would sit out in the blazing sun all day. The chickens would try to stay in the limited shadow the coop cast in the run. I decided to park it under one of my oak trees where it will get shade in the summer and sun in the winter. The final reason I parked it is pretty shitty. I will explain in a moment.


I had to make sure the foundation was solid. I decided to lay a bunch of 8" x 16" patio stones instead of pouring concrete, just in case I ever need to move it. The good thing about concrete is it levels itself passively with gravity. It took me a long time to level all of these stones. I used a flat shovel, a 4 ft level, a tape measure and some gin and juice. Eventually everything lined up. Note the position of the chicken tractor.


I started to arc the tractor towards its final resting spot two weeks before I put the stones down. Every two days I would move the tractor a little closer. Once I got it to this spot, the next move was its last. One of the reasons I choose this spot is it has electric at the light pole. I don't plan on using heat lamps, but you never know when you will want power for something. 


Back to the shitty reason to park the chicken tractor. When the tractor is moved, all the chicken shit is spread over the whole yard. When it is parked, you can do what is called the "deep litter" method. The principle is the same as composting your kitchen scraps. You just need to get your carbon (straw / leaves) to nitrogen (chicken shit) ratio right. The chickens will constantly scratch the straw and deposit nitrogen, efficiently turning your compost for you. It is amazing how fast a bale of straw turns into dark nutrient rich compost. I throw a lot of kitchen scraps and yard waste in as well. You can harvest this compost 3-4 times a year. I plan on letting it build up until the end of fall. I will harvest the compost and let it age on the garden beds over the winter. This will ensure the compost is not to "hot" with nitrogen when I plant in the spring.


Here is the final product, painted yellow of course to match the house, garage and dog house. The egg collection door is about 25 ft from the back door of the house. It is easy and convenient to collect the eggs everyday. We let the chickens out when we get home from work and on the weekends. Otherwise they are busy turning straw to compost. 


Tuesday, September 30, 2014

Feed And Water Buckets


I made a 5 gallon chicken feeder and a 5 gallon water bucket for the chicken coop. These come in handy when leaving for a few days or so you don't have to fill a smaller feed and water bucket everyday.


You start with a 5 gallon food grade bucket available at any hardware store. I used a jigsaw to cut out the holes in the side. If you have a 2-3 inch hole cutter for your drill, I would use that. You can find the metal pan at any agriculture store for about $5.


I screwed the metal pan to the 5 gallon bucket. Run your screws through the metal pan into the 5 gallon bucket. I screwed wine corks into the screws inside the bucket to hold it in place. I am sure there is a better way to do it, but this worked well for me.


For the waterer, start with a food grade 5 gallon bucket. You will need to pick up some horizontally mounted chicken nipples to make this waterer. You can find them here. Follow the instructions that come with them. You basically drill a hole smaller than the widest part of the nipple you screw in. You then screw the nipple into the bucket until it is tight and upright. The best part is the chickens can't get the water dirty!


Monday, September 29, 2014

DIY Chicken Tractor


This post is long and long overdue. I built a chicken tractor over the spring. What's a chicken tractor you ask? Well that depends on if you ask a green tractor chicken or a red tractor chicken...

Most people look at me funny when I say I have a chicken tractor. I think they imagine a dozen chickens tethered to a plow or something. A select few probably imagine an actual chicken driving a tractor. If you fall into the latter camp, I would love to know what you think a cock fight is. Leave a comment down below.

A chicken tractor is simply a chicken coop and run that can be moved. Most people build the tractor with the bottom open to the grass and move it every couple days. This allows the chickens to graze fresh pasture and bugs while being protected from predators. 


I bought three 4 ft x 16 ft cattle panels from our local agriculture store. I am surprised I didn't get pulled over driving like this. Make sure you have some pads and good ratchet straps if you are going to attempt something like this.


DISCLAIMER: I built this chicken tractor too heavy and it is a pain to move. If you are going to follow the design in this blog you should seriously consider moving it with a riding mower, instead of by hand. 

Material list: ( I am sure I am missing something, but this should be most of the supplies used.)
  • 3 - 4ft x 16ft cattle panels.
  • 2 - Pressure treated 12ft 2x4's.
  • 2 - Pressure treated 8ft 2x4's.
  • A lot of untreated 2x4's. I seriously went back twice to get more. Maybe a dozen or so.
  • 1 - 4ft x 8ft x 1/2 inch plywood.
  • 3 - 4ft x 8ft x 1/4 inch plywood.
  • 3 rolls of 25ft hardware cloth with 1/2 inch squares.
  • 2 rolls of 25ft chicken wire.
  • 3 - 2ft x 8ft galvanized steel corrugated metal roofing sheets.
  • 1 Box of "U" Grip-Rite staples.
  • 1 Box of self-tapping metal screws.
  • 1 Box of neoprene washers for self-tapping screws. 
  • 1 Box of exterior screws. 
  • 8 - 6 inch lag bolts with washers and nuts.
  • Metal cutting blade for circular saw.
  • Spool of galvanized wire.
  • Exterior paint.
  • Ratchet straps
  • Various power tools.


Everything I read about building chicken tractors said "DO NOT BUILD IT TOO HEAVY". I figured I could build the tractor on sleds and pull it around the yard with no problem. Boy was I wrong. If you actually keep the finished weight of your tractor manageable, you could move it around the yard on sleds. Before I put the coop in, I could pull it around easily by hand. 


Once you have the ends of your 12ft 2x4's rounded off, you can now attach the cattle panels. I overlapped the panels to fit inside the runner boards.You can make your tractor longer or shorter than this, its up to you.


I used Grip-Rite staples to attach the cattle panels to the 2x4's. I ended up going back and putting two more staples in each square. I measured half way down the 2x4 and lined the cattle panel up so it is in the center of the 2x4.


You will want some help bending the cattle panels. Once I had them in a "U", I used ratchet straps to hold it in place. I then attached the 8ft 2x4's to hold it together. Make sure you have the sides you stapled the cattle panels to, facing in. You don't want the panels pushing out against the staples on the outside.


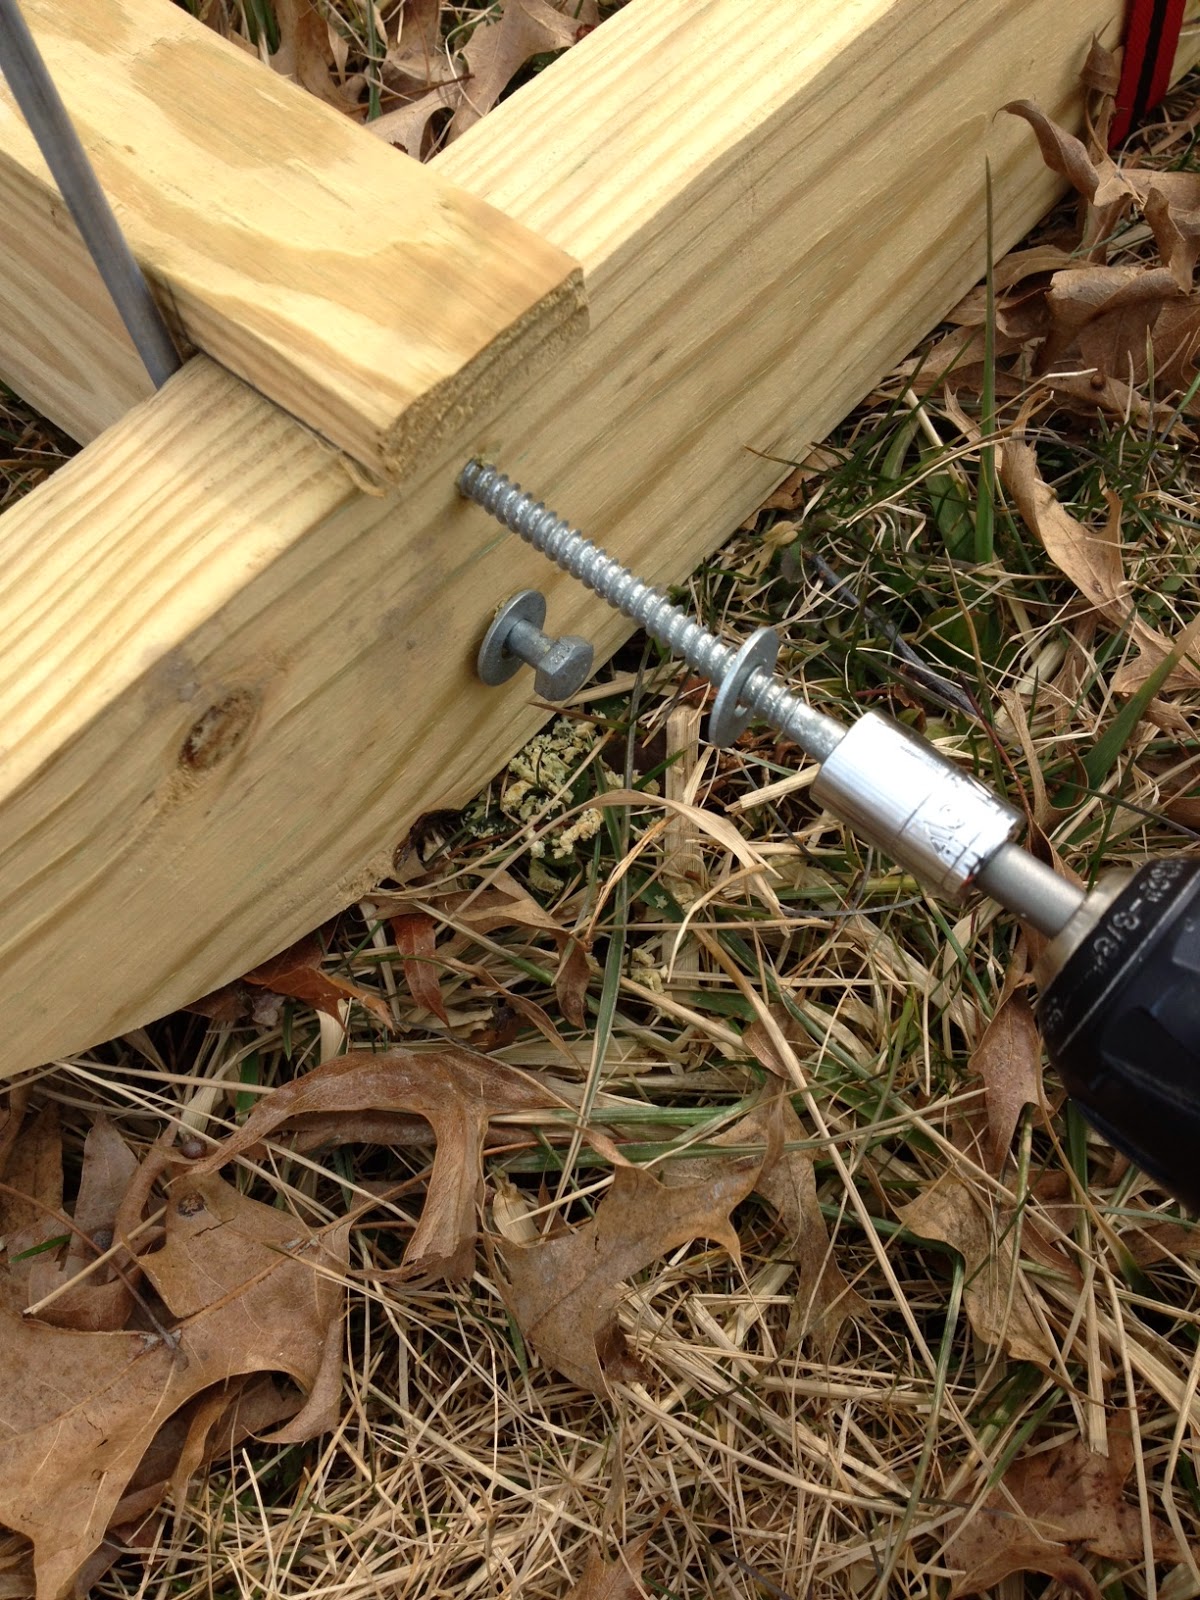
I used two, 6 inch lag bolts on each corner. Notice I cut out a 1 1/2 inch section on the 8ft 2x4's , leaving a 1/2 inch on the top. This is so when you move the tractor, the front and back boards are not dragging on the ground. Make sure you do this to both sides on the front and back 8ft 2x4's.


Here is the frame all bolted together. At this point it was easy to move around on the sleds. If you didn't want a coop in your tractor, I think you could move this by hand pretty easily, even once all the hardware cloth and chicken wire is attached.


Here is my solution to crafty critters like racoons. Racoons have been known to figure out slide locks and other closing mechanisms. To my knowledge, they haven't figured out carabiners yet. I will let you know if they do.


One of the hardest parts of building the tractor was cutting the plywood to fit on the ends of the coop. I cut it perfectly round, then had to adjust it multiple times to get it to fit. An easy way to get a perfect half circle is to tie a string the length of the radius of the half circle you want, to a pencil. Place the open end of the string in the middle of your board and pull the string taut. Move the pencil to the left and right until you have your half circle drawn.


I spent a lot of time "shaving" off wood to get the ends of the coop to fit. I didn't want to go to far, you can't add wood back on, so I had to cut a little, go check the fit, and cut some more.


You can use whatever you want for a roof. I chose metal for longevity and I think it looks cool. I bought a metal cutting blade for my circular saw and cut these 8 ft galvanized panels in half.


I then screwed them together using self driving metal screws with water tight washers. I overlapped each panel so water will run down the outside and not leak in. Make sure the overlaps are going the right way when you put the roof on.


Here is a close up of a self driving screw with rubber / metal washer. Buy a magnetic bit for your drill, it will be worth every penny.


You should end up with something like this. Some people use plastic tarps for chicken tractor roofs. That would make a much lighter roof, but it would need to be replaced every couple years or so.


I ripped a lot of 2x4's to make this tractor. I attached the roof to three ripped 2x4's that I ran at the height I wanted the bottom of the coop to be. I then screwed the roof into more ripped 2x4's along the inside of the roof. I off set these in about 2 inches on each side. I used these to attach the front and back of the coop walls.


The floor of the coop is then screwed into the ripped 2x4's on the bottom. You want to use the 1/2 inch plywood for the floor of the coop. You will want to do most of your interior work on the coop before you attach the final wall.


In my attempt to keep the weight of the chicken tractor down, I used very thin plywood and ripped a bunch of 2x4's to build the nest boxes.


I ended up going with 6 nest boxes for my 16 laying hens. Each box is approximately 12 inch x 12 inch at the opening with head room once they step into the box. I designed a small incline you can see in this pic on the bottom of the nest boxes. This will hopefully make the eggs roll back to the collection door. 


Here I am installing the nest boxes. I ran some more ripped 2x4's on the floor of the coop to screw the front and back wall into. Make sure these are set back as far as the ripped 2x4's the roof is screwed into so the walls fit straight. The nest box is screwed into the ripped 2x4 in the back. I had to put another ripped 2x4 under the front of the nest box to keep my slope. Make sure your nest box roof has a steep pitch on it, or your chickens will hang out on top of it.


Dara and my sister helped attach the hardware cloth and chicken wire to the cattle panels. You can use plastic zip ties for this if you want. I opted to go with a more permanent solution and used galvanized wire. Make sure you attach the hardware cloth securely and not allow any part of it to be able to be pulled away from the cattle panels. Critters that want to eat your chickens are diligent and crafty.


I decided to go up the cattle panels 4 ft with hardware cloth. I used chicken wire, which is cheaper, to cover the top. The main reason I chose hardware cloth is; raccoons have been known to put their arm through chicken wire and kill chickens if they get too close to the wire. If a raccoon climbed the hardware cloth to put his arm into the chicken wire, he would not be able to grab any chickens.


Here is the interior of the coop all finished. I put a temporary board over the entrances to the next boxes. If you are raising your birds from chicks, you want to keep them out of the next boxes until they are ready to lay. Once I attached the front coop wall, I cut out this entrance and used a larger piece of plywood as a door. I want to replace it with plexiglass one day so I can spy on them. You can see the hinge and door on the bottom right of the pic. I harvested some saplings for the roosts. You want them to be about 2 inches wide.


Because I made the coop to heavy to pull on the sleds, I decided I would put wheels on it to move it. Another mistake. Drilling through 1/4 inch steel is hard, I went through 4 bits drilling all the holes.


The wheels are on the bottom of the steel bars. The holes above them are where they get attached to the tractor. This creates an offset so when you lift the steel bar handle, the coop raises off the ground about a foot. In principle, this is a great idea. When I actually tried to move the coop, it wouldn't budge. The wheels are to small and narrow for all the weight of the tractor. I plan on taking these off of the chicken tractor and using them on a much lighter tractor for broiler birds next year.


Sorry about the bad photos, I can only move the tractor at night when the chickens have gone up to roost. This pic shows how the wheels raise the tractor off of the ground. I have a small hole drilled in the steel bar where that piece of 2x4 is. Once I have the bar perpendicular to the ground, I put a nail through the bar and into the 2x4 to hold it in place.


The solution I finally came up with to move this beast was to use the wheels to raise the tractor off of the ground, and then lay 3 inch PVC pipes under it. The tractor is movable at this point. I am not saying it is easy, just movable. You have to stop after you pull the tractor over the PVC and reposition the PVC to move the tractor again. A real pain in the cloaca. 


Here is the tractor all done except for painting the coop walls. I moved it around the yard every three days or so for about 3 months. A post coming soon will explain why I stopped moving it and what I did with it.

Learn from my mistakes and either use these plans to make a stationary coop, or build a lighter version that can be moved by hand. If you have a lawn tractor you may be able to move a coop like this. Hope this helps. Leave a comment if you have any questions or if I left something out you would like to know about.