So this is how much cedar you need to make two
top bar hives. Actually I messed up my calculations
and had to buy a few more boards. =)
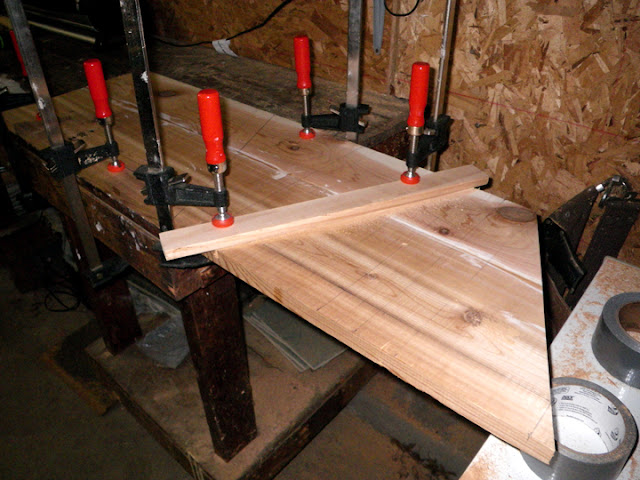
I couldn't find 12 x 1 inch boards so I had to glue 8 x 1 & 4 x 1
inch boards together to make the sides and ends.
I brought them in over night to dry while clamped.
These are the follower boards. I cut them out of a single board
I had previously glued together. I used a hand saw because I
wanted to make sure my cuts were precise. I used a piece
of wood as a guide so my cuts would be straight.
Here are the follower boards clamped and glued to a top bar.
The plans for this hive are free on the internet
here. I highly recommend this
site and the information available on it.
The forum alone is worth its weight
in honey.
Here I am screwing the ends to the sides. This is relatively easy
if you any wood working skills and you follow the suggestion
of the plan designer by using your follower boards as guides.
My life became much easier once I received my birthday present!
How did she know I wanted this specific portable table saw.
I have a very nice, beautiful and caring fiance who understands
the value of good machinery at the end of my outstretched arm
pointing at my soon to be birthday present when
I drag her to the local box store. =)

The table saw sped up the making of the hives so much. In fact
I don't think I could have made the top bars the way
I chose to make them, without it.
To seal the bottom I bought translucent plastic crochet sheets from
a craft store. You need to make sure whatever you use has small
enough holes to keep unwanted pests out of your hive. The
recommendation is something with 8-10 holes to the inch.
Here are the hives with legs. The front hive has the skeleton of the
roof, it needs cedar shingles to be complete. The back
hive has the top bars laying on it after I cut the
1/8 inch groove in the center of each for wax.
Here is one of the roofs with the cedar shingles in place. I place
a plastic sheet over the top of the hive before I put the roof on.
This water proofs my hive. If you opt to make your roof
completely water proof you can skip the plastic sheet.
Here are the top bars. Note the center of each bar has
a 1/8 inch groove cut out. This will be filled with
wax so the bees can use it as a comb guide.
On the left are freshly filled top bars. The bars on the right
have been cleaned up so only the wax in the center
is left. Note because I cut the groove straight through
the top bars some sort of stop needs to be used to
keep the wax from spilling out of the ends when
you pour the wax. I opted for duct tape, of course. =)
This is what 10,000 bees look like. The queen is in the
center in a segregated box so the newly acquainted
worker and drone bees don't kill her right away.
It is interesting that in a couple days the queen
bees pheromones will convert the ravenous
queen-blood thirsty bees into a complacent hive
ready to defend the her to the death.
Here I am shaking the bees out of their holding cell
and into their new home. I did not get stung on
hiving day, although I had a bee crawl up my
leg because I forgot to tuck my pants into my socks.
Luckily it was a drone and couldn't sting me. =)
So here is the finished project. Every piece of wood on the
hive is cedar even the legs. You could make a hive
much cheaper than I did, but I personally did not
want to use pressure treated or chemically
painted wood for my hives.


